

How To Install Deck O Seal
What is composite decking?
Composite decking is made from a mix of forest fibres, plastics and bonding agents. The resulting boards terminal longer than traditional timber decking, and they are very low maintenance.
Composite decking is very durable, and resistant to rot and damp. The boards don't take to be sealed, stained or painted and even in straight sunlight they won't fade, warp or cleft. The boards also absorb minimal amounts of water, which means they are highly slip resistant. They are an increasingly popular alternative to timber decking.
Where should I lay my composite decking?
Of import factors to recall near when planning your decking include how dry and level the ground is, how much sunday information technology will get, and how much privacy y'all volition have.
Start by planning your deck to scale on paper and try to be as accurate as possible with measurements and expansion gaps. Carefully plan your decking layout and effort to limit cut and wastage. Try to plan your deck to fit only whole boards, to avoid having to awkwardly cut a board lengthways to fill a gap.
If you are going to build your decking next to a house then make certain it's 150mm beneath the damp-proof course and that you don't cover whatever air bricks. You likewise need to ensure that the necessary fall of the decking is 1:100, with the slope running away from the house.
This guide outlines the method for building a single level composite deck with a timber frame and horizontal deck board positioning. You lot tin can be very flexible with composite decking layouts, merely acquit in mind that they may require slightly different techniques and joist positioning.
Here are a few examples of different decking designs yous tin can install:

Is composite decking like shooting fish in a barrel to install?
Blended decking is relatively easy to install if you have planned your layout accurately and have a solid timber frame as a base. The deck boards fit to the frame using specific fasteners and screws.
You will need to acclimatise your boards on site for at least 72 hours prior to installation. When the boards make it, lay them on a ground sheet and keep them covered upwardly.
Equally with all decking in that location are a few safe measures which you will need to follow.
Building a deck does involve a lot of moving, lifting and cutting heavy timber. Because of the size and weight of the timbers and the frame, it'southward always easier and safer if you tin can get somebody to help you.
Ever use structural treated timber and screws specifically designed for the task, and treat all cut surfaces with two coats of preservative. This volition ensure a hard wearing, long lasting deck.
When sawing, use the 90-degree guide marking on your saw, or a fix square, to make accurate cuts, and sand the cut ends to remove splinters. When drilling, mark out all pilot holes to ensure your fixings are as authentic as possible.
Make sure that you vesture appropriate protective clothing, such as gloves, a confront mask, or safe goggles, when cutting or sawing timber, and applying preservatives or other timber treatments.
Offcuts of treated timber should never be burned as they volition release toxins into the air. Always dispose of them safely at your local recycling or waste disposal center.
How practice I prepare the footing for a composite deck?
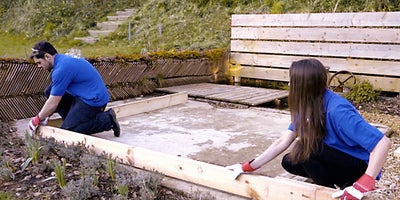
An existing patio or concrete base tin be used as a solid foundation for your deck. Start by measuring and marking out the required expanse.

If you lot're laying your deck over the lawn and so mark out the surface area using pegs and builders line. Use a straight edge to cut the edges, then remove the turf and dig the soil out to a depth of 50mm.
Comprehend the ground with landscaping or weed control fabric and weigh it down with gravel or pea shingle. If you lot're laying on soft ground and then identify paving stones on elevation of the gravel – these will properly back up the joists and preserve the timber. Use a spirit level to make sure the stones are all on the same level.

How to build the frame for composite decking
If your decking is going to be longer than the decking joists you lot will need to bring together two sections together to create the decking frame. If you don't need to bring together upwardly your joists then skip straight to 'Assembling the internal joists' department.
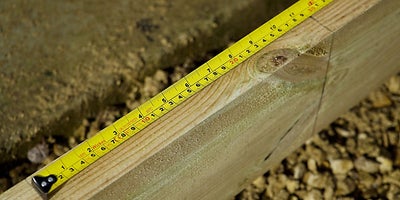
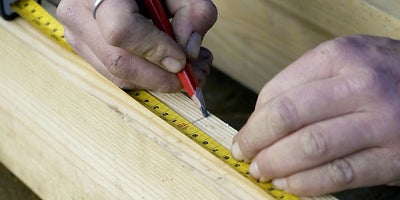
To bring together upwards your joists start by measuring and cutting the section you need to attain the required length.

Measure and cutting a dissever section 600mm in length, and and so mark its centre point at 300mm. Secure the three sections in your workbench and make certain that the 300mm marking lines upward with the join of the joists.
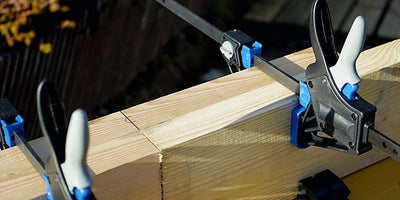
You now need to measure and marker four guidelines on the joists. Measure and marking a spot 75mm from each side of the bring together. And so measure and mark another spot 150mm from each side of the join. Apply a set up square to draw a straight vertical line through each of the four marks.
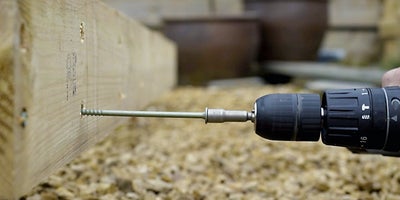
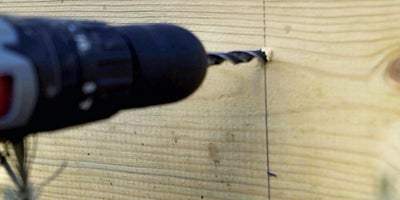
Mark two evenly spaced pilot holes into each of the lines you lot have drawn. Drill airplane pilot holes with a 6mm wood drill bit and secure the joists together using 100mm screws. Countersink the screws if you will exist using fascia boards. The joist is at present ready to move into position.
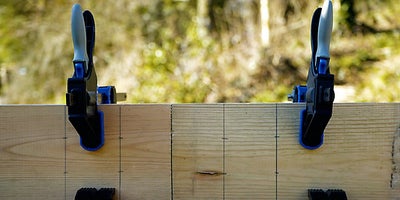
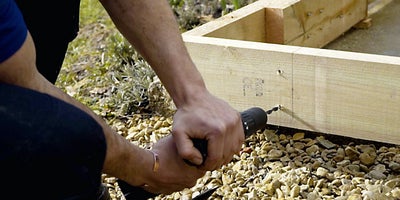
Put your joists into position with whatsoever extended joists at the end where there will exist the to the lowest degree through traffic. If the sides of your frame volition be difficult to access, y'all may accept to assemble the complete frame earlier request a friend to help you lot move it into its final position.
Utilise a set square to bank check that the corners are foursquare. And so mark and drill airplane pilot holes before using two 150mm timber screws to set up the corners together. Countersink the screws if yous will be adding a fascia.

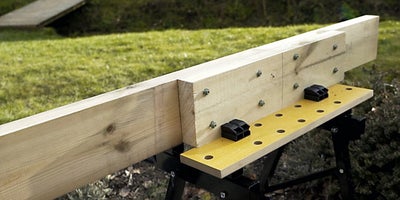
The decking frame should now be at the correct level. Employ risers, paving slabs or treated offcuts of timber at 500mm intervals to help with this, and cheque with a spirit level.

Assembling the internal joists
The positioning of your internal joists will be dependent on the design you have chosen for your composite decking. Here we are laying our boards horizontally, so our joists demand to be spaced at 300mm intervals.

Measure and mark out the positioning of the joists onto the frame, making sure you don't exceed the recommended spacing. Then measure out and cut your joists accordingly. For detailed instructions on how to extend external joists, read our guide on How To Plan & Lay A Deck.
Using a prepare square, extend your mark down the external face of the frame and mark two pilot holes, i 40mm from the top of the frame and one at 40mm from the lesser. Drill the airplane pilot holes using a 6mm wood drill bit. Drill countersink holes if you are going to add a fascia.
Secure a joist in your workbench and attach joist hangers to both ends using 30mm external grade screws.

To secure the joist to the frame, identify information technology into position so the centre of the joist lines upward with the spacer marker. The joist end must be flush with the exterior frame, and then either use packers to keep it in place, or enquire someone else to assistance. Secure the joist using 100mm timber drive screws.
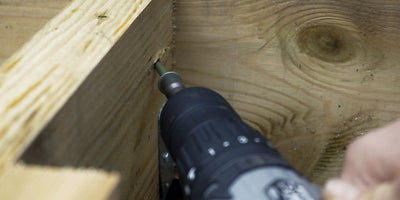
If you take to secure the joist onto an unexposed side of the frame then drill a skewed pilot hole at a 45 degree angle, then fix with a 100mm timber bulldoze spiral.
Once all the internal joists are in place, add together the last 30mm screws to each joist hanger.
Fixing the noggins in place
Noggins are short pieces of timber that fit between internal joists and provide stability and rigidity to the decking frame. The width of each 1 is stock-still by the width between joists.
When measuring the joists lengthways to decide how many noggins yous need, endeavor to make certain the distance between them is never greater than 1200mm. To avoid having to skew screws it's best to stagger the position of the noggins.
To fix them, put the noggin in position so its pinnacle is level with the joist. Utilise packers if necessary.
Marking the center of the noggin's position on each joist and use a set square to depict a vertical line down the joist. Then measure and mark ii pilot holes on each line, 40mm from the top and 40mm from the lesser.
Drill pilot holes before securing the noggin with 100mm external timber drive screws. Once all the noggins are in place, cheque that your frame is level, and all your fixings are secure.
How to lay composite decking
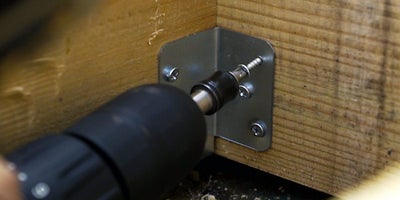
Now your timber frame is complete you tin can lay your composite deck boards. If you lot have no overhang or you lot take a fixed deck, brainstorm by fitting starter clips forth the outer edge of the frame. Secure these clips with the screws and drill bit provided.
For our decking we are working with an overhang. Put your showtime board into position, making sure the overhang is no more than than 25mm. If you will exist adding a fascia, place an offcut of board underneath the overhang to ensure the edges will be affluent with each other.

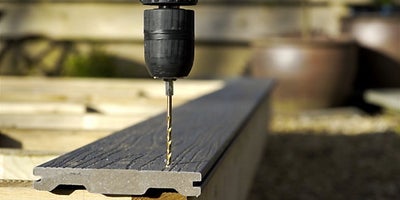
Measure in 30mm from the edge of the lath and drill a pilot hole using a 4mm drill bit. Repeat this process down the length of the board, and then fix the board using composite deck screws.
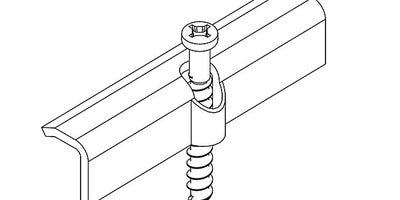
With the first board in position, slide the hidden fastener clip into place so it sits inside the groove of the deck board, and direct in the centre of the joist below. These fasteners are used to secure the deck boards and ensure a consistent 6mm expansion gap.
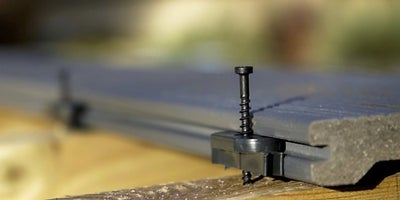
Tighten the clip until information technology's most 75% secure – there'southward no need to fully tighten information technology merely yet. Repeat this procedure down the length of the decking board and so there's a fastener clip at every joist.

Put the next board into position so that the fastener clips sit down within its groove. Try not to button or force the board. Then repeat the above process, adding a new set of fastener clips for this second board.
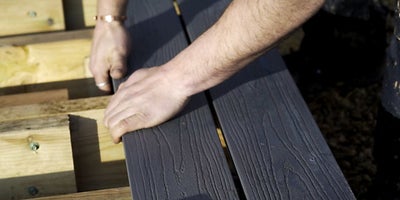
Once the second lath is 75% secure you can finish tightening the screws in the beginning row. Repeat this procedure for each successive decking board you lay down. Call back to lay downwards the next board before fully tightening the screws on the previous board.

If you are adding a fascia lath, start by measuring and marking 40mm in from each end of the lath, then use a chalk line to connect the marks. Using the chalk line as a guide, mark at 300mm intervals down the length of the board.

Drill your pilot holes and put the fascia board into position, ensuring a 40mm ventilation gap betwixt the bottom of the board and the ground. Place packers underneath the fascia or ask someone to hold information technology level whilst yous prepare it to the frame. Then secure the fascia with 63mm composite decking screws.

Mark two evenly spaced pilot holes onto each of the lines y'all have drawn. Drill pilot holes using a 6mm wood drill chip. Secure with 100mm timber drive screws. Countersink the screws if you are adding fascia boards later.

When extending the internal joists, repeat the same joining process as the outer frame, but with the addition of an extra 600mm section on the opposite side to sandwich the joist in place. Offset the bolts slightly then they don't come into contact.

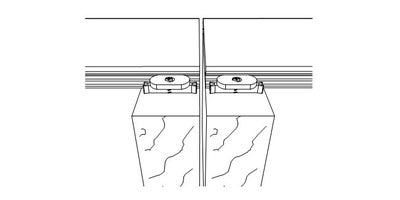
Butt joins
If you need two deck boards to see finish to end this volition create a "butt" articulation. All butt joints must sit down on doubled upwards back up joists that have a drainage gap of ten-25mm between them. Secure with 4 fastening clips, two at each end of the board, existence sure to leave the recommended expansion gap between boards. Try and get the fastening clips equally shut to the edge of the boards as possible, as this volition aid the edges of the boards to look fifty-fifty.

Source: https://www.wickes.co.uk/how-to-guides/garden-landscaping/install-composite-decking
Posted by: higginsbuttleace.blogspot.com
0 Response to "How To Install Deck O Seal"
Post a Comment